To handle the form input whose values can be changed over time, a model-driven approach is followed by the Angular reactive forms. Angular reactive forms are thus also known as model-driven forms. A simple form-control can be created and updated, in reactive forms. One can also use multiple controls in a group, validate form values, and implement more advanced forms in reactive forms.
An explicit and immutable approach is used by the Reactive forms to manage the state of the form at the specified time. A new state is returned to manage the integrity of the models between changes when the form state is changed. The user can build his own representation of a form in the component class, in reactive forms. While ensuring consistent and predictable data on request, Reactive forms are also easy to test.
To add a single form control:
For adding a single form-control, we are creating a form here with a single input field, whose value is captured by the form. The current value of the form control element is then displayed by the form. Follow the below steps to add a single form control.
Step 1: Register the reactive forms module:
import { ReactiveFormsModule } from '@angular/forms'; @NgModule({ imports: [ ReactiveFormsModule ], }) export class AppModule { } |
Explanation:
Here, we are importing the ReactiveFormsModule from the @angular/forms package. To use the reactive forms, the imported module is added to the NgModule’s “imports” array.
Step 2: Generate and Import a new form-control:
Syntax: To generate a component for the control:
ng generate component NameEditor |
The FormControl class which is the basic building block used in reactive forms is imported into the component to register a single form-control. A new instance of the form control is created to save as a class property.
name-editor.component.ts file:
import { Component } from '@angular/core'; import { FormControl } from '@angular/forms'; @Component({ selector: 'app-name-editor', templateUrl: './name-editor.component.html', styleUrls: ['./name-editor.component.css'] }) export class NameEditorComponent { name = new FormControl(''); } |
Step 3: Register the control in the template:
The control created in the component class is now added to the form control element in the template. To update the template with the form control, the formControl binding provided by FormControlDirective is used.
<label> Name: <input type="text" [formControl]="name"> </label> |
Here, the form control is registered to the name input element in the template. The form control and DOM element can thus communicate with each other. The view reflects changes in the model. The model reflects changes in the view.
Step 4: Display the component:
To display the form, the form control component is added to the template.
app.component.html:
<app-name-editor></app-name-editor> |
Output:
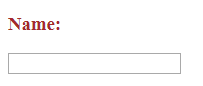
Explanation:
The reactive form created is thus displayed as the output.