[ad_1]
Here’s a fun project if you want to learn how to build Azure Functions. This project is going to be a little silly but educational.
We will build a QR Code Generator that runs 100
If you’d rather watch a video we have the full tutorial here:
In This Tutorial, You Will Learn:
- How Azure Functions work and how simple they are
- How to generate QR codes with .NET libraries
- How little effort is required to build something like this
It’ll be fun, and I hope you follow along. What we’ll do in this tutorial:
- Create an Azure Function
- Implement a QR generator
- Build a crude frontend for it
- deploy it to Azure with Azure Functions Core Tools.
By the end of this tutorial, you’ll have a functional QR code generator, and it may inspire you to build more cool things with Azure Functions. They are compact, simple, and easy to build.
You can find the full source code to this project here.
What Is an Azure Function?
Azure Functions are serverless applications that run in Azure. They’re small bits of code you can execute without a server or complicated instance. Most Azure Functions are “microservices” that do one small task and do it well.
Azure Functions can also respond to HTTP triggers to act as a sort of “mini API.” They respond to HTTP requests just like a Web API would, but it takes much less setup with functions.
I’m starting to sound like an advertisement, but it is awesome. Years ago, this same project required you to set up a server or set up an ASP.NET Web API on an IIS server somewhere. Now we can do it in a few lines of code and push it to the cloud. Azure Functions allow you to focus on building cool stuff instead of all that setup.
Requirements
Here’s what you’ll need for this tutorial. I’ll build this in Windows 11, but we’re not using Visual Studio. I’ll use the dotnet driver for this, so you can replicate it on Mac or OSX if you’d like. You will have to have this (free) software installed on your machine.
You will need:
So let’s get started!
Creating a New Project
We’re going to use the Azure CLI to create a new Azure function for us, and we’ll use the dotnet driver to install the software.
Visual Studio can automate this for us, but doing it this way gives a better view of the steps involved and can be done on many platforms.
First, we’ll initialize a new function. We’ll use the func command to create a new project named QRCodeGen. We’ll specify the worker runtime as “dotnet” to choose C# as the language used.
Run this command in your project or repositories folder:
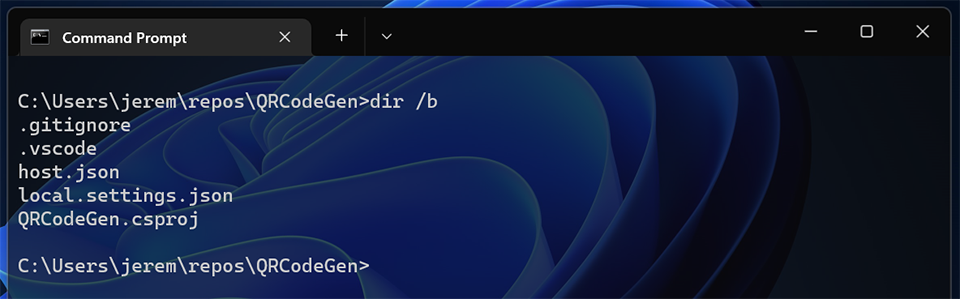
func init QRCodeGen --worker-runtime dotnetIf you look in the folder, there isn’t much here:
We still need to create an Azure Function within the project. Azure Functions have a set of templates, depending on what type of application you’re making. We want to create an HTTP trigger, a function that responds to an HTTP request.
func new --template "Http Trigger" --name QRCodeGen --authlevel anonymous
If you’re using Visual Studio Code, you may see this message:
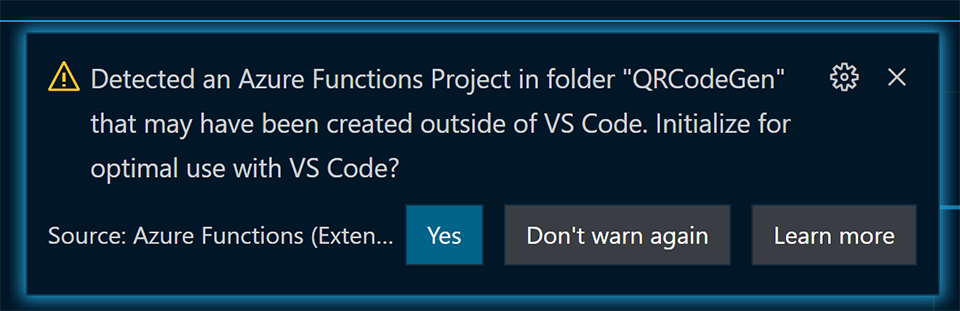
Select yes to install the extensions.
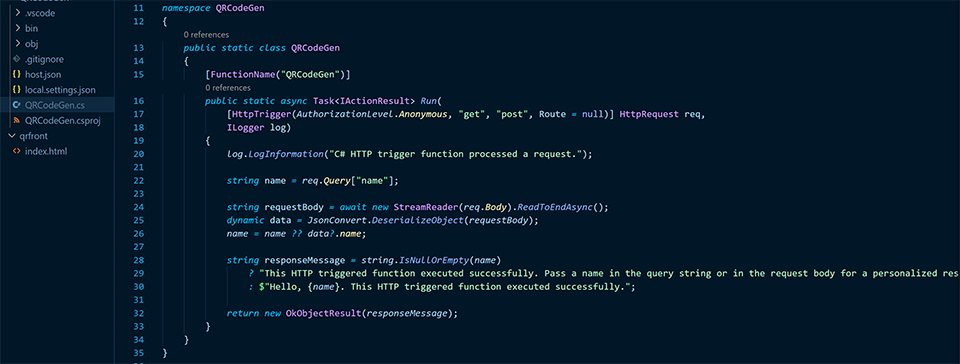
Now you will see a sample function that func created for you:
You can run it locally if you want to try it out. Type in
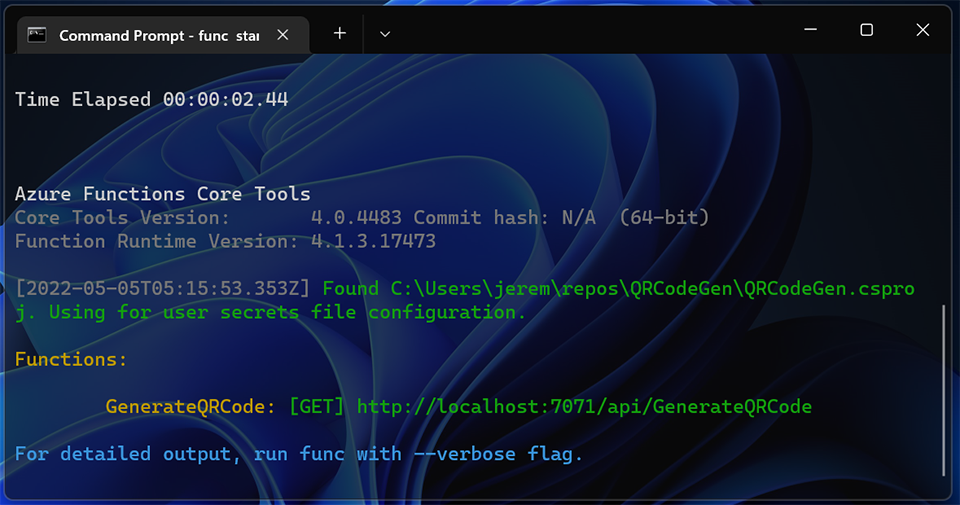
You will then see the function startup, and the console will give you some guidance on how to use the application:

As we can see, we can either send a GET or a POST to http://localhost:7071/api/QRCodeGen. Let’s load it up in a browser and see what a simple GET returns:
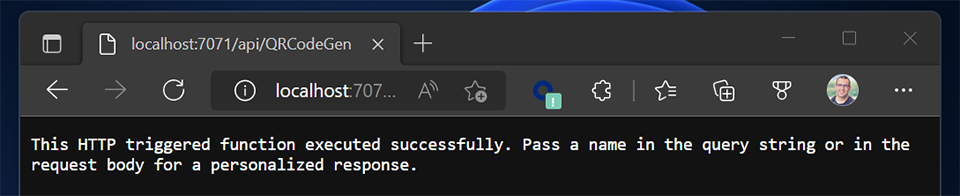
We have a message showing:
This HTTP triggered function was executed successfully. Pass a name in the query string or in the request body for a personalized response.
Ok cool. Let’s dig into the code and see what this message means.
string responseMessage = string.IsNullOrEmpty(name)
    ? "This HTTP triggered function executed successfully. Pass a name in the query string or in the request body for a personalized response."
    : $"Hello, name. This HTTP triggered function executed successfully.";
As you can see in the code above, it’s doing a check for a value in name. If that variable is empty or null, it will display the message we just saw.
But how do we populate that value? A few lines up, we see a parameter in the query that we can use:
string name = req.Query["name"];It will display a message with the name included if it’s populated. We need to send it a URL with the name as a parameter like this:
http://localhost:7071/api/QRCodeGen?name=Jeremy
So let’s try that:

And there’s my message. So now we know the function is working as expected. We load up a URL, get the parameter and modify the output.
For simplicity, we’ll use this model for our QR code generator. We’ll establish our URL to listen for requests, and pass the value in a GET command, then return a QR code. Let’s start with generating that QR Code.
Install QRCode Generation tools
Turning text into a QR code is relatively complex. Luckily, you’re using .NET. You won’t have to build your generator by hand. The problem was solved a long time ago. We will use a library to generate a .PNG QR code for us. We only have to write some code around it and build a tool that solves our problem.
First, let’s install the QRCode Generator package from Manuel BL. We’ll do that using the dotnet driver. I’ll specify the latest version at the time of this writing.
dotnet add package Net.Codecrete.QrCodeGenerator --version 2.0.1The QRCode generator works great but can only generate .svgs. Since we want a .PNG (bitmap) format, and want it to work under multiple environments, we need to install the SkiaSharp package:
dotnet add package SkiaSharpSkiaSharp includes the ability to generate bitmaps. But you must download and add this file to your project:
https://github.com/manuelbl/QrCodeGenerator/blob/master/Demo-SkiaSharp/QrCodeBitmapExtensions.cs
Create a file named QrCodeBitmapExtensions.cs in your project folder and copy the contents of this file to it. This will allow you to work with bitmaps, specifically .PNG files.
Now we have our QR Code generator tools, so let’s make it work in our function.
Creating the QR Code Generator Function
If you open up QRCodeGen.cs, you’ll see the Azure Function (a method) generated for us. It will look like this:
[FunctionName("QRCodeGen")]
        public static async Task<IActionResult> Run(
            [HttpTrigger(AuthorizationLevel.Anonymous, "get", "post", Route = null)] HttpRequest req,
            ILogger log)

            log.LogInformation("C# HTTP trigger function processed a request.");

            string name = req.Query["name"];

            string requestBody = await new StreamReader(req.Body).ReadToEndAsync();
            dynamic data = JsonConvert.DeserializeObject(requestBody);
            name = name ?? data?.name;

            string responseMessage = string.IsNullOrEmpty(name)
                ? "This HTTP triggered function executed successfully. Pass a name in the query string or in the request body for a personalized response."
                : $"Hello, name. This HTTP triggered function executed successfully.";

            return new OkObjectResult(responseMessage);
Let’s delete this method. The only thing you should see in QRCodeGen.cs is this:
namespace QRCodeGen

    public static class QRCodeGen
Next, let’s add a new method to generate QR codes.
First, add in the name decorator. This will give the method a name and change the URL to access it.
[FunctionName("GenerateQRCode")]Now, when we run our app, the URL will be:
http://localhost:7071/api/GenerateQRCode
This will be the URL we call to generate a QR code, and we’ll call it from JavaScript.
Next, create the method:
public static async Task<IActionResult> Generate(
  [HttpTrigger(AuthorizationLevel.Anonymous, "get", Route = null)] HttpRequest req, ILogger log)
We’re creating a method named Generate. We’re passing in some parameters to tell the application we want an HttpTrigger:
[HttpTrigger
And within that trigger, we are passing some parameters.
We want to set our authorization to anonymous so that anyone can access it:
AuthorizationLevel.Anonymous
We only want to accept GET requests to this URL, so the following parameter specifies that:
"get",
Then we’ll set our route to null. If we wanted a different URL or particular route, we could specify it here. For simplicity’s sake, we’ll leave it as it is:
Route = null)]
Next, we will pass in an HttpRequest object. This will contain the data from the incoming request so that we can grab parameters from it. When a GET request is sent to our function, we can extract things like headers, parameters, and more.
HttpRequest req
Finally, we’ll pass in a logger so we can log messages.
ILogger log
Great now we have the method constructed. Let’s fill it out.
Gathering Info From the Query String
The user must send the text they want to be turned into a QR Code. It’s usually a URL. We decided early on to keep things simple. We’ll just gather this info from the query string sent to the API.
Remember that HttpRequest we passed into the method? We can get our Query parameter from that. We can establish a string variable and then grab the parameter from the query string:
string qrtext = req.Query["qrtext"];Add in the following message to log our output. We want to display what was sent to our qrtext variable:
log.LogInformation("Generating QR Code for 0", qrtext);This way, we can double-check what was sent.
Now, let’s generate our QR Code.
Generating the QR Code to PNG
Next, we want to take our string, encode it into a QR Code, then export that to a PNG.
So we’ll make a static call to the QRCode library we installed earlier. We’ll pass in the text we want to generate and the error correction value. Medium should be fine.
var qr = QrCode.EncodeText(qrtext, QrCode.Ecc.Medium);This is all it takes to generate a QR Code. But it’s in an SVG format. We need to convert it into a PNG so we can display it.
Since we added that bitmap extension above, now our qr object has a method to turn the QR code into a PNG with a few parameters.
We need to add a scale: I used 10, which seemed to generate a decent size.
I used 1 for the border.
And I set the foreground (code) to SKColors.Black, and the background to SKColors.White.
Here’s the code to enter:
var pngout = qr.ToPng(10, 1, SkiaSharp.SKColors.Black, SkiaSharp.SKColors.White);Ok, so now we have our QR Code. That was easy! Now let’s package it up in JSON and send it out!
Creating a JSON Return Object
We’ve been creating this code within public static class GenerateQRCode. Let’s create another class that will create a simple object we can return when the API is called.
Just outside of the GenerateQRCode class (before the last } ) create a ReturnObject class.
This class will have a single property named Image. This will be a string and we’ll encode our PNG as text into it.
public class ReturnObject
  public string Image  get; set;
Now back in the GenerateQRCode class, let’s go back to where we were. We’ll create a new ReturnObject:
var ourResult = new ReturnObject;Now, we’ll take our PNG image and convert it into a Base64 string, and add that string to our return object:
ourResult.Image = Convert.ToBase64String(pngout);Easy. Now we’ll just return our POCO (Plain old class object) as a new JsonResult, so it returns JSON to the caller:
return new JsonResult(ourResult);And that’s there is to it. In about seven lines of code, we’re taking a string, converting it to a QR code, and shipping it out the door.
Let’s try it out.
Start up the Function Locally
We will start up the function and have it listening locally. We’ll send a GET request with a query to test it out.
Type the following at the command line:
To start up the function.
You should see something like this:
Now we’ll send a request to
http://localhost:7071/api/GenerateQRCode
Remember the parameter we specified in our code was qrtext, so I’ll add that to the end:
http://localhost:7071/api/GenerateQRCode?qrtext="hello world"
I’m using Postman for this, so I can see the JSON rendered out:
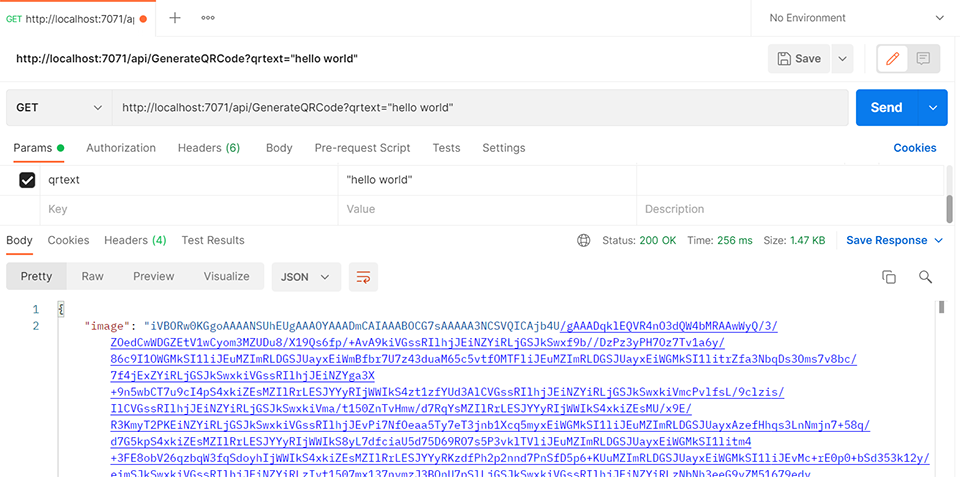
And the bit of logging we did shows that it’s rendering for “hello world”:

So the steps are simple:
- Send a GET to our URL
- Append the text to generate and add it to qrtext
- Accept the JSON.
Here’s all the code we entered so far:
public static class QRCodeGen

      [FunctionName("GenerateQRCode")]
       public static async Task<IActionResult> GenerateQRCode(
       [HttpTrigger(AuthorizationLevel.Anonymous, "get", Route = null)] HttpRequest req, ILogger log)

           string qrtext = req.Query["qrtext"];
           log.LogInformation("Generating QR Code for 0", qrtext);

           var qr = QrCode.EncodeText(qrtext, QrCode.Ecc.Medium);
           var pngout = qr.ToPng(10, 1, SkiaSharp.SKColors.Black, SkiaSharp.SKColors.White);

           var ourResult = new ReturnObject;
           ourResult.Image = Convert.ToBase64String(pngout);
           return new JsonResult(ourResult);


   public class ReturnObject
       public string Image  get; set;
And that’s fantastic, but we’re not done. We still need to deploy it. But before we do that, let’s build a small, simple JavaScript front end to interact with this function.
Building the Front End
We want this QR Code generator to be totally self-contained. While Azure Functions aren’t really designed to serve up web pages, it is possible. In this case, we can set this up so we don’t need to host our front end somewhere else. It’s just a simple webpage so let’s serve it up.
First, we’ll create our index.html.
Create a folder named www and create a file named index.html.
This is going to be a super simple, crude front end—nothing fancy, just enough to get the job done.
Add in the following at the top:
<!DOCTYPE html>
<html>
<body>

<h2>QR Code Generator</h2>
This is our basic header. Next, we’ll need to add an input to get text from the user.
<input id="inputbox" style="width: 250px;" ></input>
<br /><br />
This input has an id of inputbox, so we can grab this text with JavaScript. I added a couple of line breaks after it to space it out.
Next, we’ll create a button that will call a JavaScript function:
<button type="button" onclick="GetQRCode()">Create QR Code</button>Then we’ll have a place where we will insert the QR code. Remember this will be Base64 encoded so that we can populate this div with an image in our GetQRCode function.
Next, we’ll put in the GetQRCode function, which makes an XMLHttpRequest back into our Azure Function and retrieves the JSON. It then parses it and replaces the “demo” div with our image. Note that we’re adding an img tag with the header information so it creates an image we can view in our browser.
function GetQRCode()
  var xhttp = new XMLHttpRequest();
  xhttp.onreadystatechange = function ()
    if (this.readyState == 4 && this.status == 200)
      var ourJSON = JSON.parse(this.responseText);
      document.getElementById("demo").innerHTML = "<img src=\"data:image/png;base64, " + ourJSON.image + "\">";

  ;
  input = document.getElementById('inputbox').value xhttp.open("GET", "/api/GenerateQRCode?qrtext=" + input, true);
  xhttp.send();
 <
/script>
Great! So now we have an index page that will draw up a small UI for our QRCode Generator.
I know we could add in error correction/handling or use a library for this, but I want to keep it as simple as possible.
Next, we need to serve this up with our Azure Function.
Serving the Index Page
Azure Functions are not intended to be web servers. In fact, Azure Static Web Apps do a much better job, but we’re trying to keep this as simple as it can be. One single Azure Function to accomplish this task.
We can push out the index.html file so it will be served up by a browser. This gives a small interface for our application, and we can go back later and build a complete web app that takes advantage of this function or add it into a bundle of microservices if we like.
Open up GenerateQRCode.cs again, and at the top of our class (above [FunctionName(“Form”)]) let’s add in another function.
We want this function to return a HttpResponseMessage this time. We’re still going to make this an HttpTrigger, with anonymous authentication, and pass in the same values as before.
This time though, we need to pass in ExecutionContext context. This gives us our execution context so we can locate files within the local filesystem, and I’ll explain why in a bit.
Another is this will return HttpResponseMessage instead of an IActionResult.
[FunctionName("Form")]
public static HttpResponseMessage Form([HttpTrigger(AuthorizationLevel.Anonymous, "get", Route = null)]
                                       HttpRequest req, ILogger log, ExecutionContext context){
Next, we’re going to open the index.html file we put in the www folder and read it all in as text. This is where the execution context comes from.
We want to open up the index.html file that lives in the www folder on the filesystem where the application is running. We do that with this line of code:
string indexPage = File.ReadAllText(context.FunctionAppDirectory + "/www/index.html");Then we’ll create a new HttpResponseMessage with a status code of OK (200):
var result = new HttpResponseMessage(HttpStatusCode.OK);Now we’ll need to add some headers to that, and fill the “content” with the text we read from our index file:
result.Content.Headers.ContentType = new MediaTypeHeaderValue("text/html");
result.Content = new ByteArrayContent(System.Text.Encoding.UTF8.GetBytes(indexPage));
Now we have a 200 OK message with the text/html header and we have all the text from our index.html added to the content section of the header.
It’s pretty hacky, but it works.
Then we simply return it:
So the entire function looks like this:
[FunctionName("Form")]
public static HttpResponseMessage Form(
    [HttpTrigger(AuthorizationLevel.Anonymous, "get", Route = null)] HttpRequest req,
    ILogger log, ExecutionContext context)


    string indexPage = File.ReadAllText(context.FunctionAppDirectory + "/www/index.html");

    var result = new HttpResponseMessage(HttpStatusCode.OK);

    result.Content.Headers.ContentType = new MediaTypeHeaderValue("text/html");
    result.Content = new ByteArrayContent(System.Text.Encoding.UTF8.GetBytes(indexPage));

    return result;
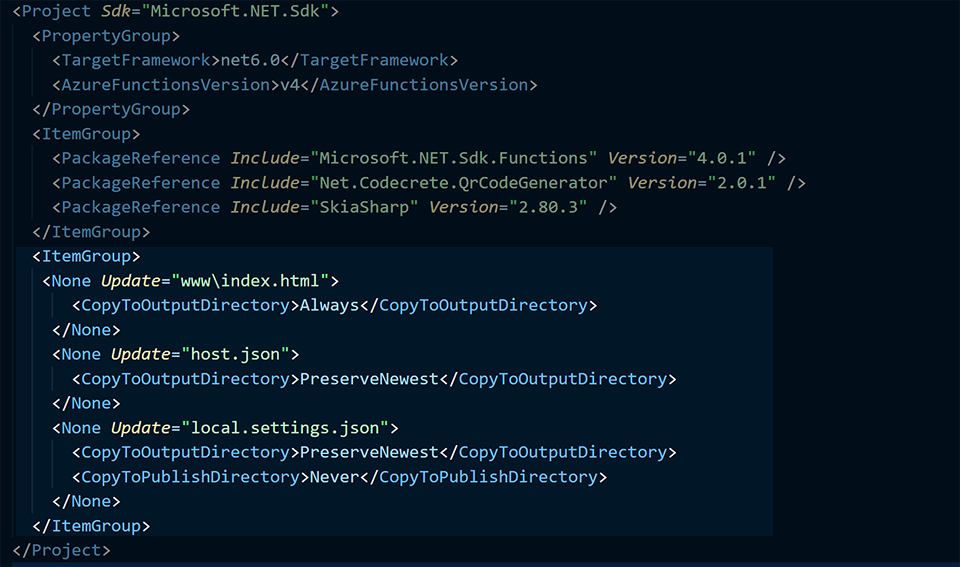
Since we’re introducing this outside file (index.html) that will need to be included in the build, we need to add this to our .csproj file. In an ItemGroup, add in the following code:
<None Update="www\index.html">
     <CopyToOutputDirectory>Always</CopyToOutputDirectory>
I added mine in with the other file publishing settings:
Save it, and let’s run our Azure Function Locally again:
And let’s see how it works.
Testing our Front End
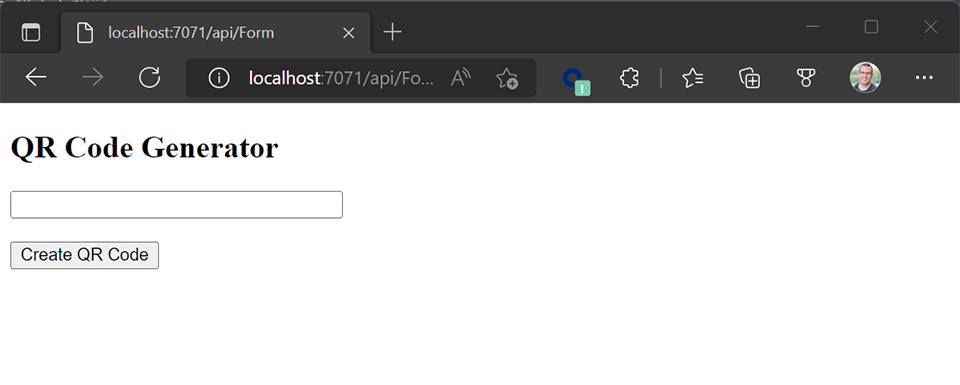
Now I have my function up and running locally, so I can just bring up a web browser to:
http://localhost:7071/api/Form
and there it is in all its glory:
So I’ll drop in a URL,
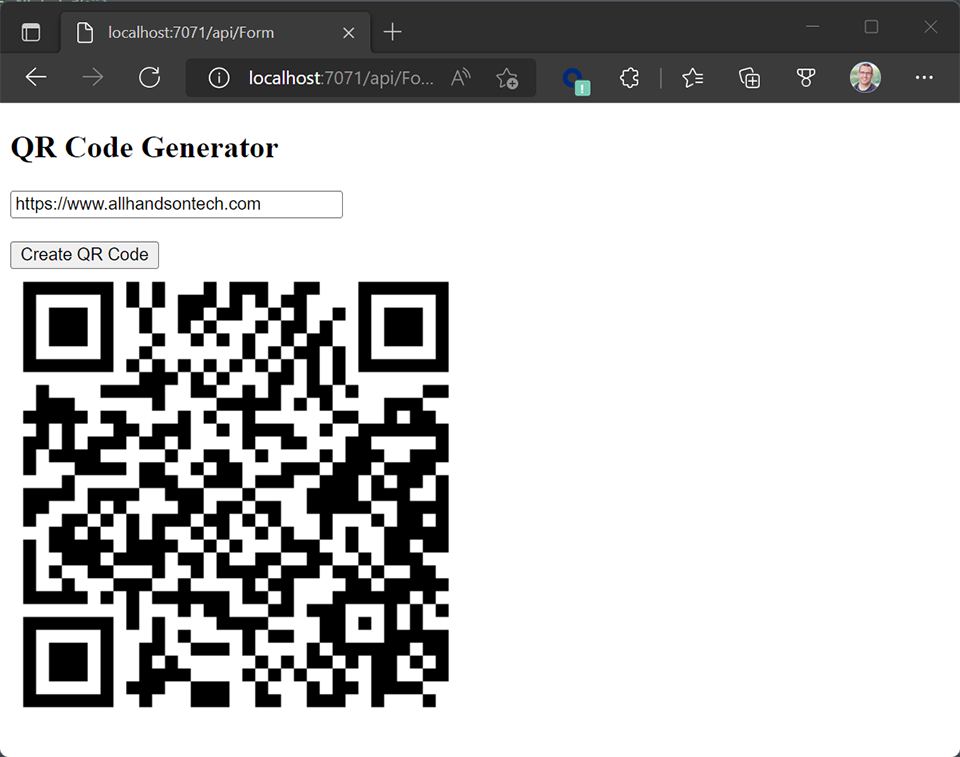
And there’s my QR Code, temporarily generated. Awesome!!
Let’s deploy this to Azure.
Deploying our Application
So I’m now calling this an “application” because it is. We’ve gone beyond the expected functionality of a simple function, just to show how powerful Azure Functions can be. Let’s deploy this and see how it works.
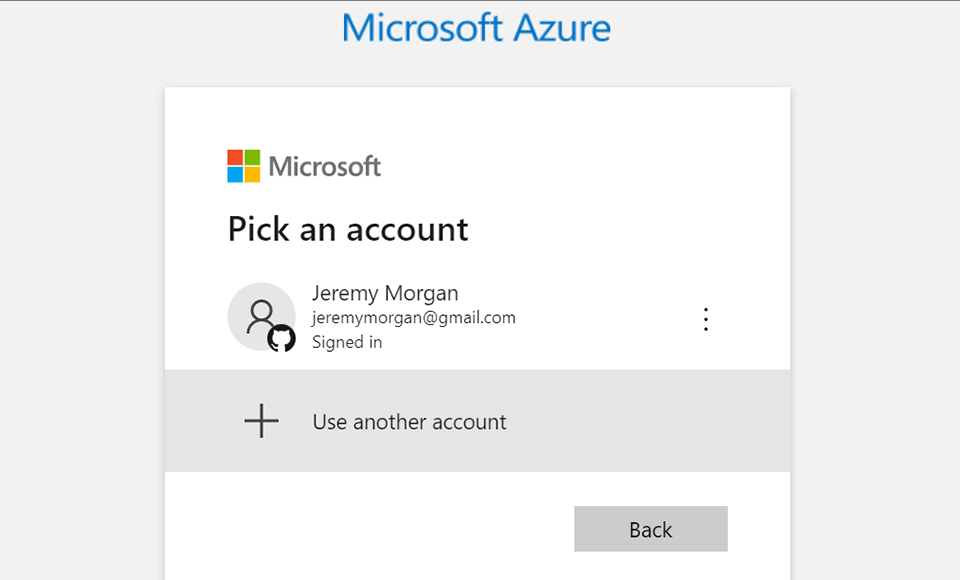
With the Azure CLI, type in
You’ll be directed via a web browser to log into Azure.
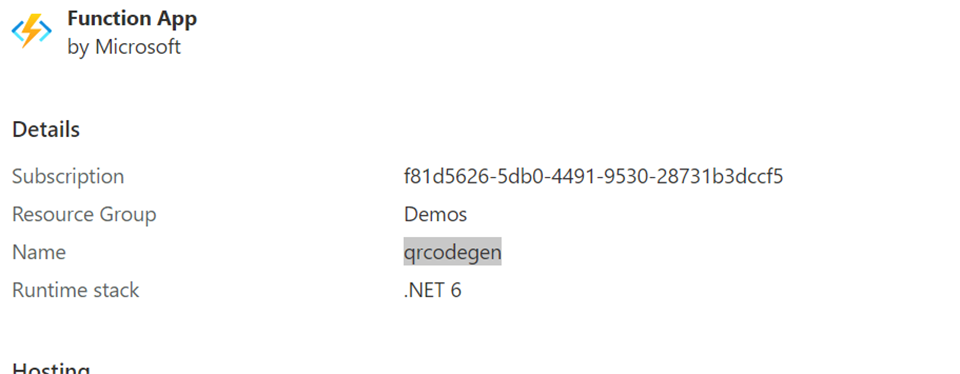
In your Azure Console, create a new Azure Function App. You can name this whatever you’d like.
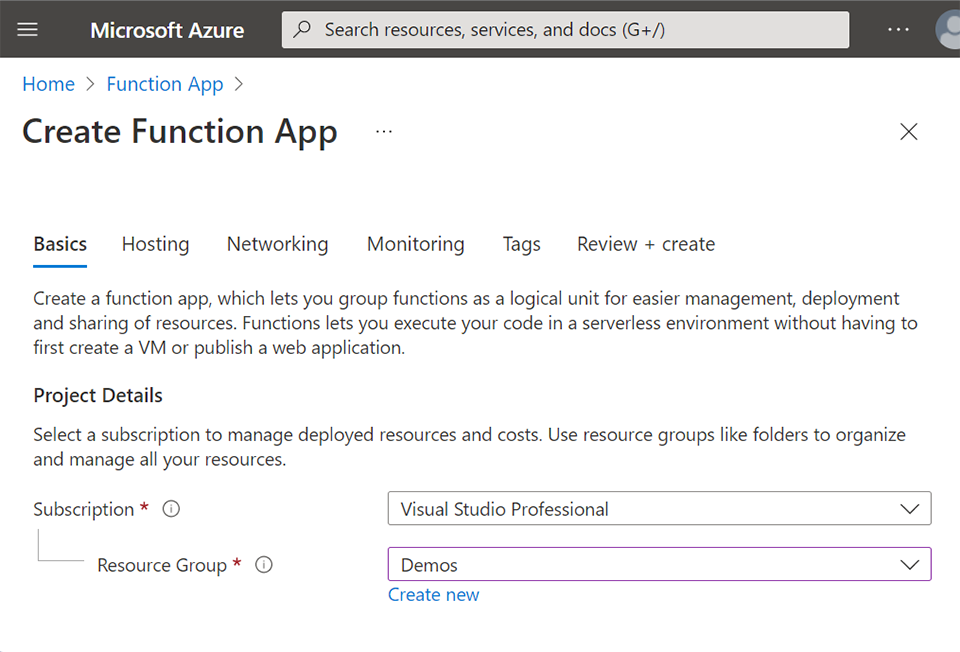
Select to publish as code, and use the following Runtime stack. You can choose whatever region you’d like.

I’ll choose Windows and the Consumption (Serverless) model:

I’ll create a new storage account and press “review and create”
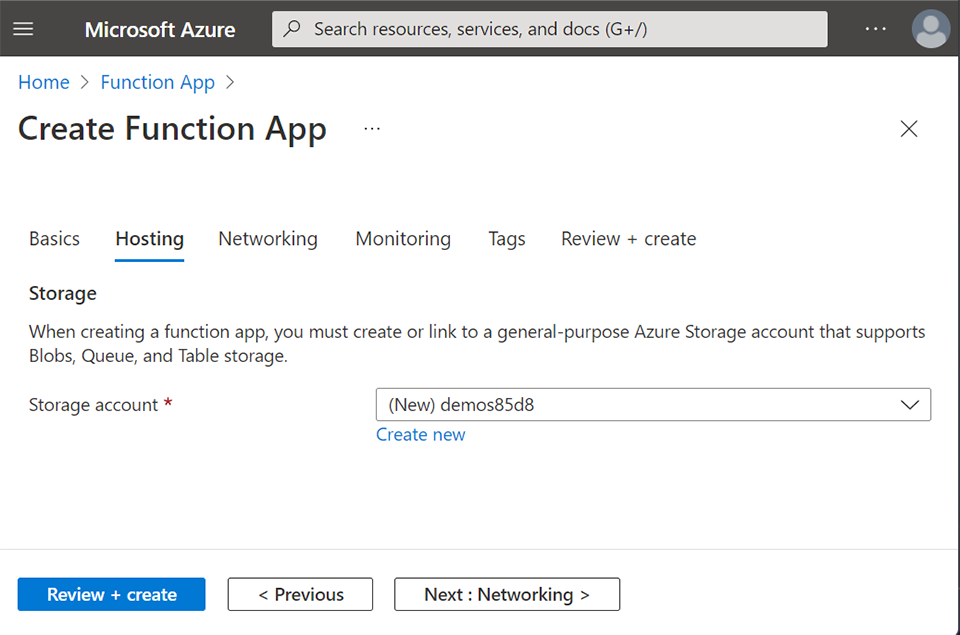
Make a note of your details:
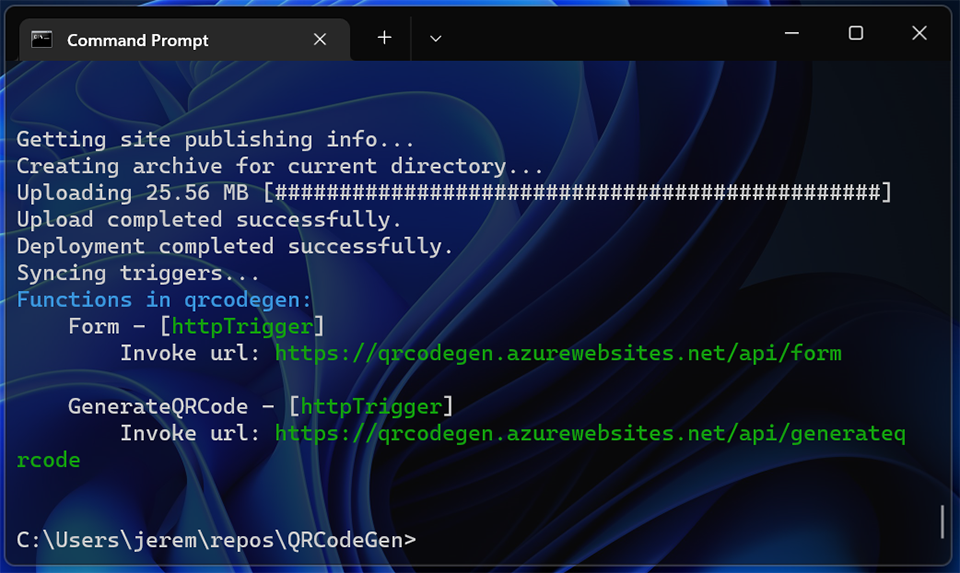
Now we need to publish with the Azure CLI. We’ll do that by using the func command and specifying that we want to publish an azure functionapp, the name, and we’ll put “–nozip” to tell the command we aren’t deploying a zip of the application, but rather the source code.
func azure functionapp publish qrcodegen --nozipYou should see something like this when it’s done.
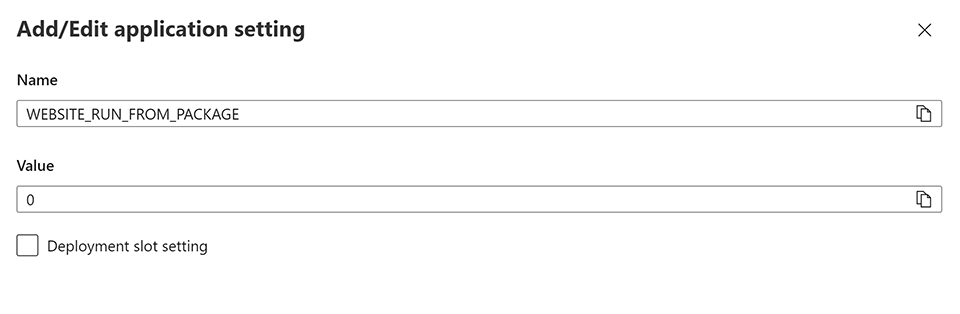
You will need to log into your Azure portal, load up the function app and select “configuration”.
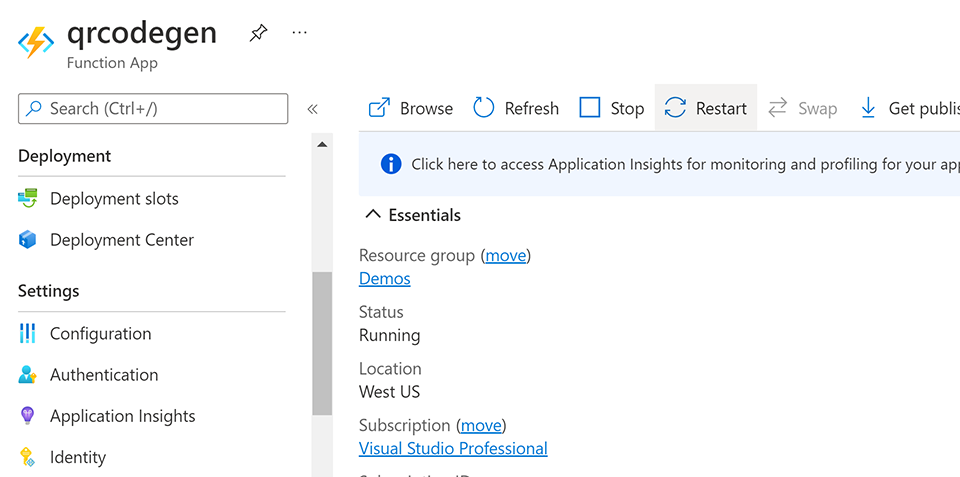
Then find WEBSITE_RUN_FROM_PACKAGE and set the value to 0. This will allow our function to run from the files we’ve published.
Let’s take a look!
Running the Application on Azure
After deployment, you should see a screen like this:

The “Form” URL is the one that will bring up our UI for the function:
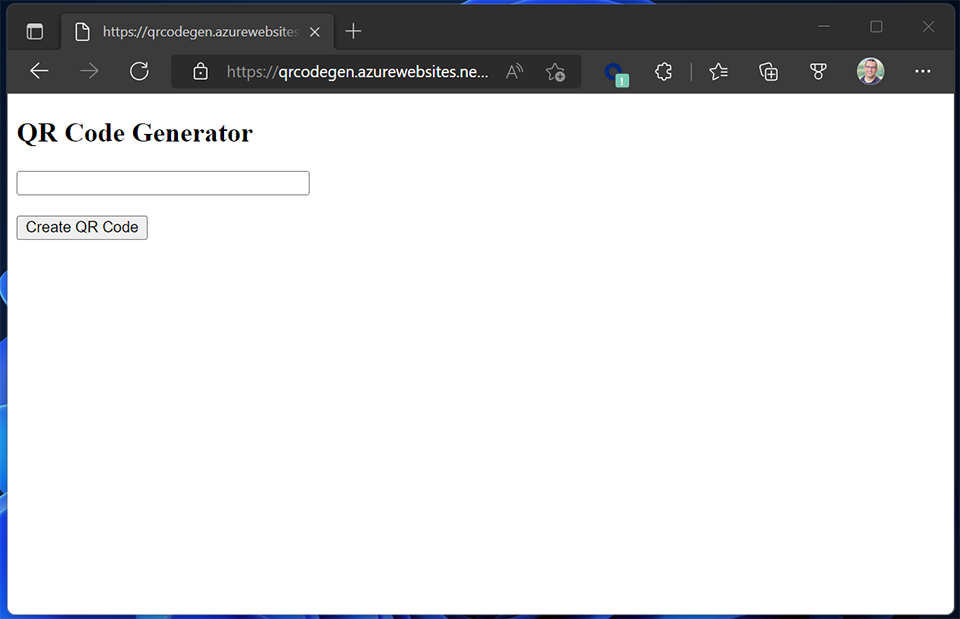
And you can punch in your website and create a QR code from it!
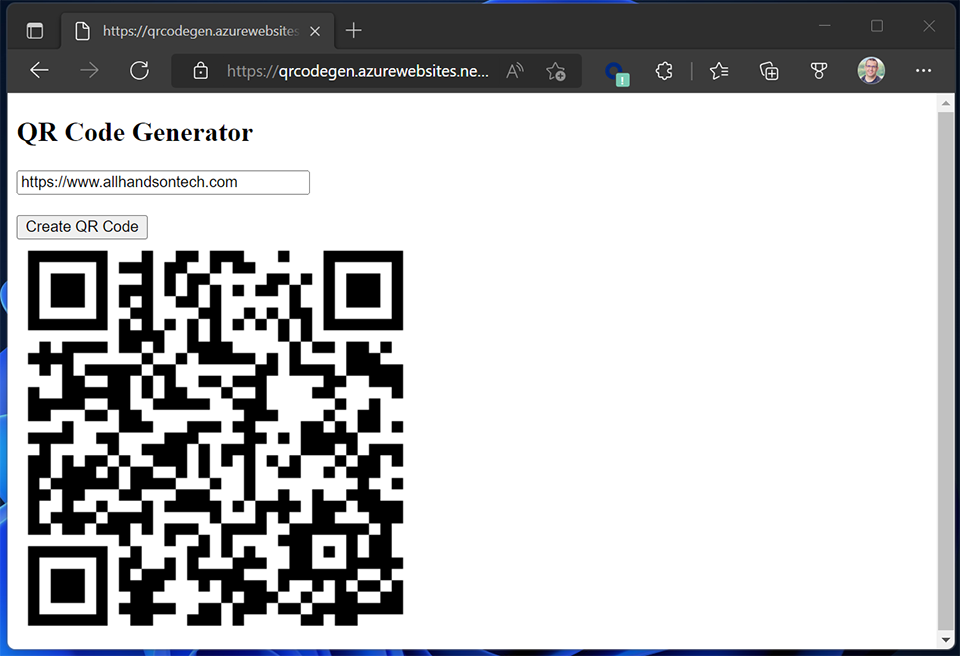
And it works!! Our very own QR code generator runs 100
Conclusion
If you’ve been following along, thanks for sticking with it! You now have a cool project and a better familiarity with Azure Functions. The full source code for this project is located here.
Serving up websites isn’t exactly what Azure functions are designed for, but I wanted this to be a complete solution front to back on an Azure Function. No servers, no databases, and you don’t have several services to keep track of.
We learned how Azure Functions work and how simple they can be. We didn’t write much code here! We learned how to generate QR codes with .NET libraries, build a mini-application and deploy it to the cloud. I wanted to keep this as simple as possible for a good introduction. If you were building a “real” application, here’s what I would recommend:
- Hosting the front end on Azure Static Web Apps or similar service
- Error checking the heck out of the input
- Graceful error handling and logging
- Pushing the images into storage for later retrieval
- Designing the API so that it can be used by other types of applications as well
If you have any questions or feedback feel free to leave them in the W3scools comments below!
[ad_2]