In Android, we can integrate Google maps in an application to display the current location, navigate location direction, to search location, and for many more such purposes. Android also provides the facility to customize Google Maps if required.
Types of Google Maps:
Different types of Google maps give a different view on the map. We have four different types of Google maps to select from. We also have an option to select no map at all. The different types of Google Maps are described below. These are:
- Normal: To display a typical road map with natural features like a river and some features built by humans, the Natural Google map is used.
- Hybrid: To display a satellite photograph data with typical road maps and also with road and feature labels, the Hybrid Google Map is used.
- Satellite: To display the satellite photograph data, but without road and feature labels, the Satellite Map is used.
- Terrain: To display the photographic data, including colors, contour lines, and labels, and perspective shading, the Terrain Google Map is used.
- None: To display an empty grid with no tiles loaded, the None Google map is used.
Syntax of different types of map:
Methods of Google map:
To customize the Google map, several methods are provided by the Google map API. We are describing each of these methods of the Google Map API.
| Methods | Uses |
| addCircle(CircleOptions options) | To add a circle to the map. |
| addPolygon(PolygonOptions options) | To add a polygon to a map. |
| addTileOverlay(TileOverlayOptions options) | To add tile overlay to the map. |
| animateCamera(CameraUpdate update) | To move the map according to the update with an animation. |
| clear() | To remove everything from the map. |
| getMyLocation() | To return the currently displayed user location. |
| moveCamera(CameraUpdate update) | To reposition the camera according to the instructions defined in the update. |
| setTrafficEnabled(boolean enabled) | To set the traffic layer on or off. |
| snapshot(GoogleMap.SnapshotReadyCallback callback) | To take a snapshot of the map. |
| stopAnimation() | To stop the camera animation if there is any progress. |
Example of Google Map:
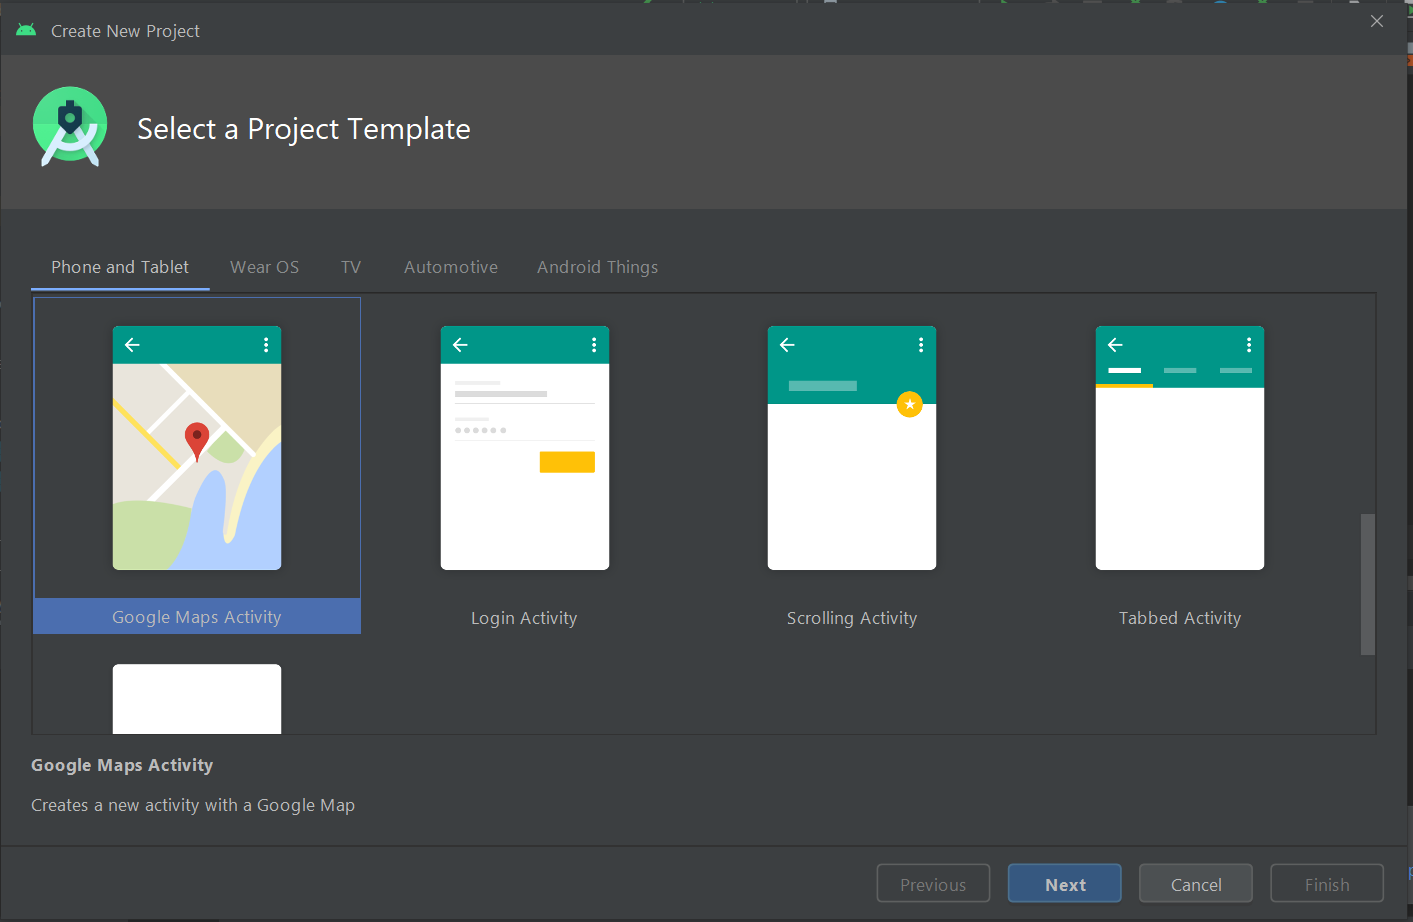
For integrating the Google Maps within an app, we need to select the Google Maps Activity.
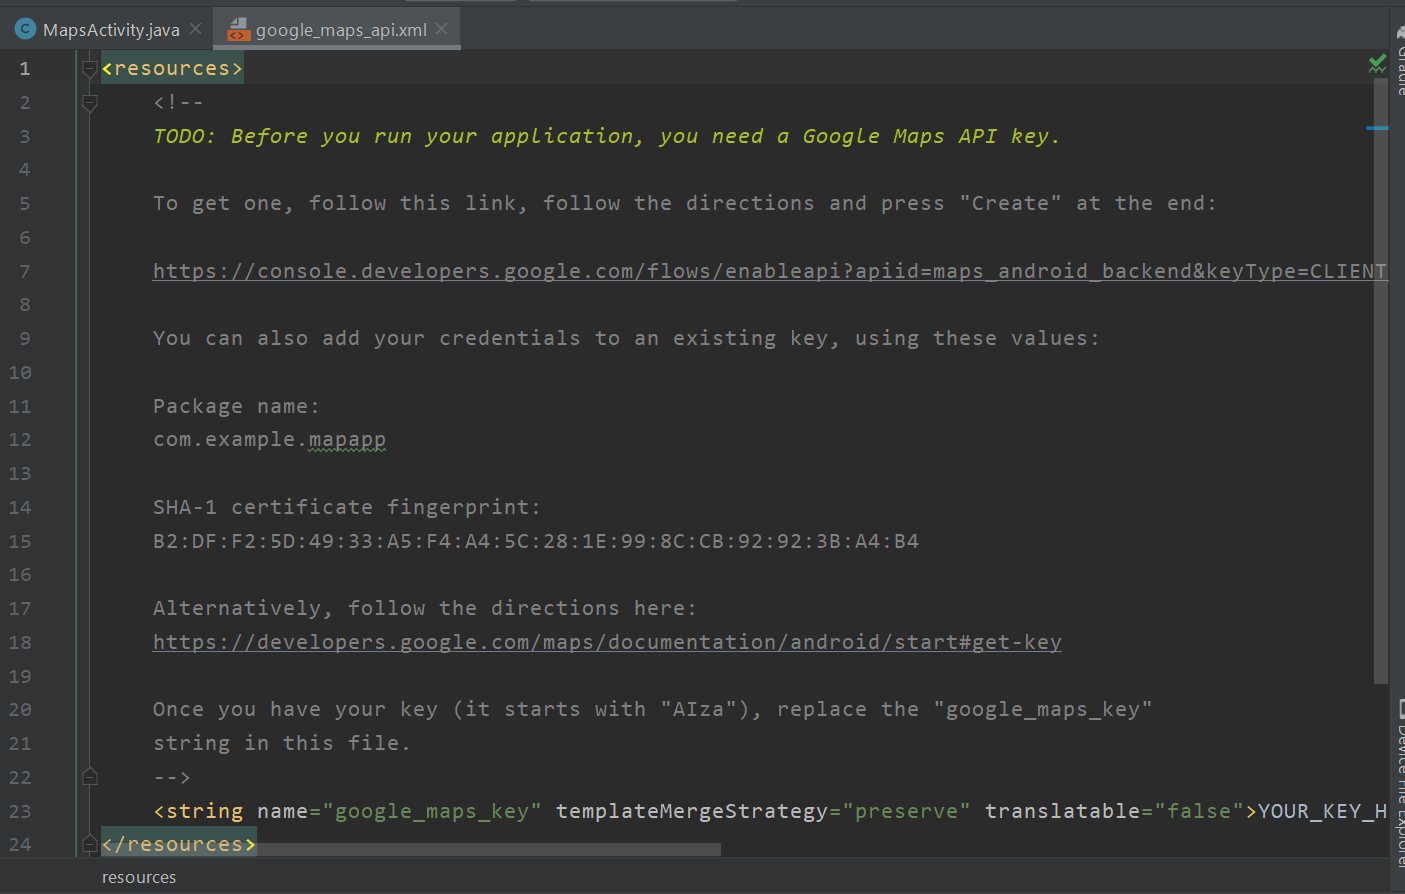
To generate the Google map key, we need to copy the URL from the google_map_api.xml file.
Now, we will paste the copied URL at the browser.
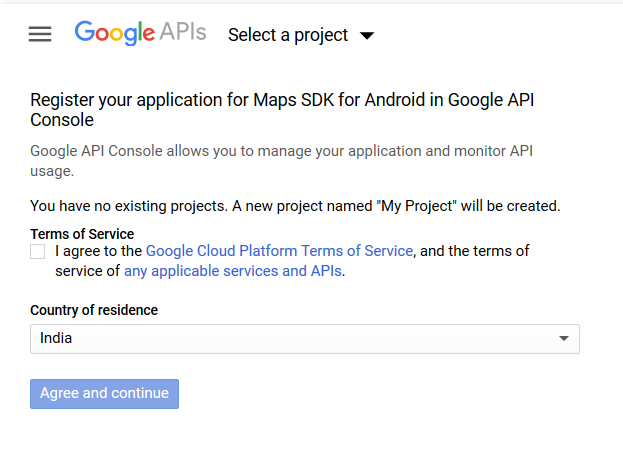
To generate an API key, we need to click on the Create API key button.
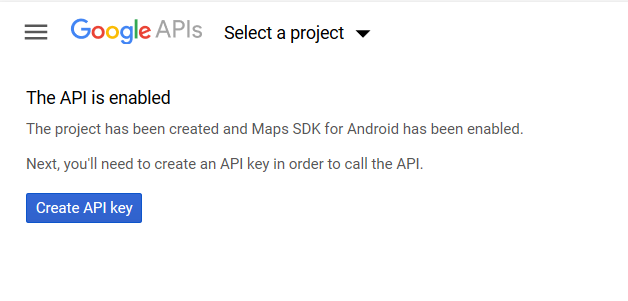
An API key will thus be generated.
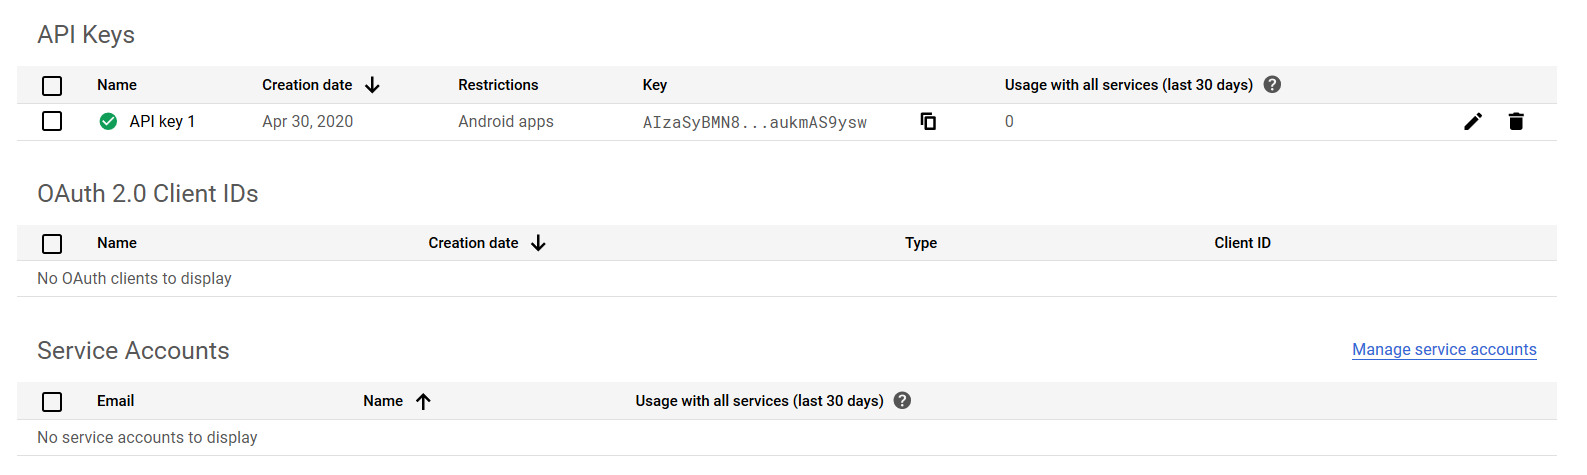
In the google_map_api.xml file, we will copy the generated API key.
File: activity_maps.xml:
<?xml version="1.0" encoding="utf-8"?> <fragment xmlns:android="http://schemas.android.com/apk/res/android" xmlns:map="http://schemas.android.com/apk/res-auto" xmlns:tools="http://schemas.android.com/tools" android:id="@+id/map" android:name="com.google.android.gms.maps.SupportMapFragment" android:layout_width="match_parent" android:layout_height="match_parent" tools:context=".MapsActivity" /> |
MapsActivity.java: (File: MapsActivity.java)
The OnMapReadyCallback interface needs to be implemented to get the GoogleMap object in our MapsActivity.java class. Along with this, we also need to override the onMapReady() callback method, to serve the same purpose.
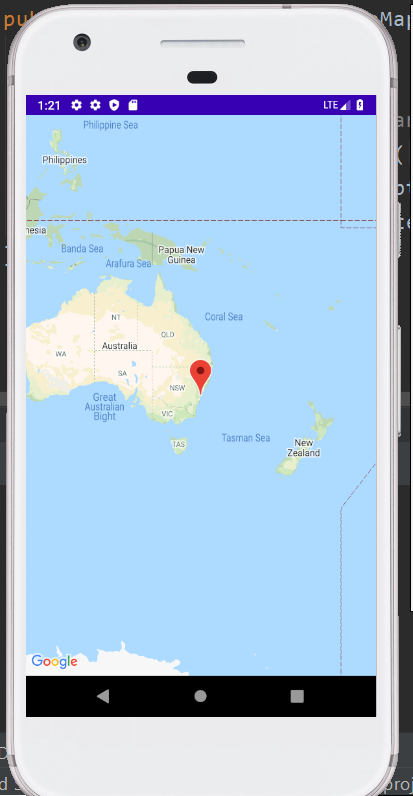
package example.com.radoapp; import android.support.v4.app.FragmentActivity; import android.os.Bundle; import com.google.android.gms.maps.CameraUpdateFactory; import com.google.android.gms.maps.GoogleMap; import com.google.android.gms.maps.OnMapReadyCallback; import com.google.android.gms.maps.SupportMapFragment; import com.google.android.gms.maps.model.LatLng; import com.google.android.gms.maps.model.MarkerOptions; public class MapsActivity extends FragmentActivity implements OnMapReadyCallback{ private GoogleMap mMap; @Override protected void onCreate(Bundle savedInstanceState) { super.onCreate(savedInstanceState); setContentView(R.layout.activity_maps); // Obtain the SupportMapFragment and get notified when the map is ready to be used. SupportMapFragment mapFragment = (SupportMapFragment) getSupportFragmentManager() .findFragmentById(R.id.map); mapFragment.getMapAsync(this); } @Override public void onMapReady(GoogleMap googleMap) { mMap = googleMap; // Add a marker in Sydney and move the camera LatLng sydney = new LatLng(-34, 151); mMap.addMarker(new MarkerOptions().position(sydney).title("Marker in Sydney")); mMap.moveCamera(CameraUpdateFactory.newLatLng(sydney)); } } |
Android Manifest:
In the AndroidManifest.xml file, we will add the required user-permission.
Required Permissions:
<uses-permission android:name="android.permission.ACCESS_FINE_LOCATION" /> <uses-permission android:name="android.permission.ACCESS_COARSE_LOCATION" /> <uses-permission android:name="android.permission.INTERNET" /> |
File: AndroidManifest.xml:
<?xml version="1.0" encoding="utf-8"?> <manifest xmlns:android="http://schemas.android.com/apk/res/android" package="example.com.radioapp"> <!-- The ACCESS_COARSE/FINE_LOCATION permissions are not required to use Google Maps Android API v2, but you must specify either coarse or fine location permissions for the 'MyLocation' functionality. --> <uses-permission android:name="android.permission.ACCESS_FINE_LOCATION" /> <uses-permission android:name="android.permission.ACCESS_COARSE_LOCATION" /> <uses-permission android:name="android.permission.INTERNET" /> <application android:allowBackup="true" android:icon="@mipmap/ic_launcher" android:label="@string/app_name" android:roundIcon="@mipmap/ic_launcher_round" android:supportsRtl="true" android:theme="@style/AppTheme"> <meta-data android:name="com.google.android.geo.API_KEY" android:value="@string/google_maps_key" /> <activity android:name=".MapsActivity" android:label="@string/title_activity_maps"> <intent-filter> <action android:name="android.intent.action.MAIN" /> <category android:name="android.intent.category.LAUNCHER" /> </intent-filter> </activity> </application> </manifest> |
build.gradle:
In the build.gradle file, we will add the following dependencies.
dependencies { implementation fileTree(dir: 'libs', include: ['*.jar']) implementation 'com.android.support:appcompat-v7:26.1.0' implementation 'com.google.android.gms:play-services-maps:11.8.0' testImplementation 'junit:junit:4.12' androidTestImplementation 'com.android.support.test:runner:1.0.1' androidTestImplementation 'com.android.support.test.espresso:espresso-core:3.0.1' } |
Output: