A QR code or barcode scanner is sometimes required in an android application. There are various ways to scan the QR code programmatically:
- Using a web-based API solution:
The QR code or barcode is uploaded to the server, and the result is returned by the server.
- Using a web-based application:
The camera is accessed to scan the QR code or barcode and the result is returned.
- By Integrating the Mobile Vision API of Google Play Service.
Android QR Code Scanner Example:
In the below example, we will use the Mobile Vision API of Google Play Service to scan the QR code that supports the below formats of the barcode.
- 1D barcodes: EAN-8, UPC-A, EAN-13, EAN-8, UPC-E, Code-93, Code-128, Code-39, Codabar, ITF.
- 2D barcodes: QR Code, Data Matrix, AZTEC, PDF-417.
activity_main.xml:
In the activity_main.xml file, we will write the below code.
<?xml version="1.0" encoding="utf-8"?> <RelativeLayout xmlns:android="http://schemas.android.com/apk/res/android" xmlns:tools="http://schemas.android.com/tools" android:id="@+id/relativeLayout" android:layout_width="match_parent" android:layout_height="match_parent" android:padding="4dp" tools:context=".MainActivity"> <TextView android:layout_below="@id/button" android:layout_centerInParent="true" android:layout_marginBottom="10dp" android:text="Bar Code Reader" android:textSize="16sp" android:textStyle="bold" android:layout_width="wrap_content" android:layout_height="wrap_content" android:id="@+id/txtContent"/> <Button android:layout_width="wrap_content" android:layout_height="wrap_content" android:text="Scan" android:layout_marginTop="50dp" android:layout_centerHorizontal="true" android:id="@+id/button" /> </RelativeLayout> |
build.gradle:
In the build.gradle file, we will add the Google Mobile Vision API.
implementation 'com.google.zxing:core:3.2.1' implementation 'com.journeyapps:zxing-android-embedded:3.2.0@aar' |
MainActivity.java:
In the MainActivity.java file, we will add the code to call the ScannedBarcodeActivity.java class, on the button click.
import androidx.appcompat.app.AppCompatActivity; import android.content.Intent; import android.os.Bundle; import android.util.Log; import android.view.View; import android.widget.Button; import android.widget.TextView; import android.widget.Toast; import com.google.zxing.integration.android.IntentIntegrator; import com.google.zxing.integration.android.IntentResult; public class MainActivity extends AppCompatActivity { Button btnBarcode; TextView textView; @Override protected void onCreate(Bundle savedInstanceState) { super.onCreate(savedInstanceState); setContentView(R.layout.activity_main); btnBarcode = findViewById(R.id.button); textView = findViewById(R.id.txtContent); btnBarcode.setOnClickListener(new View.OnClickListener() { @Override public void onClick(View v) { IntentIntegrator intentIntegrator = new IntentIntegrator(MainActivity.this); intentIntegrator.setDesiredBarcodeFormats(intentIntegrator.ALL_CODE_TYPES); intentIntegrator.setBeepEnabled(false); intentIntegrator.setCameraId(0); intentIntegrator.setPrompt("SCAN"); intentIntegrator.setBarcodeImageEnabled(false); intentIntegrator.initiateScan(); } }); } @Override protected void onActivityResult(int requestCode, int resultCode, Intent data) { IntentResult Result = IntentIntegrator.parseActivityResult(requestCode, resultCode, data); if (Result != null) { if (Result.getContents() == null) { Toast.makeText(this, "cancelled", Toast.LENGTH_SHORT).show(); } else { Log.d("MainActivity", "Scanned"); Toast.makeText(this, "Scanned -> " + Result.getContents(), Toast.LENGTH_SHORT).show(); textView.setText(String.format("Scanned Result: %s", Result)); } } else { super.onActivityResult(requestCode, resultCode, data); } } } |
AndroidManifest.xml:
In the AndroidManifest.xml file, we will add the below code that includes these uses-features and uses permissions.
<uses-feature android:name="android.hardware.camera.autoFocus" /> <uses-feature android:name="android.hardware.camera" /> <uses-permission android:name="android.permission.CAMERA" /> <uses-permission android:name="android.permission.ACCESS_NETWORK_STATE" /> |
File: AndroidManifest.xml:
<?xml version="1.0" encoding="utf-8"?> <manifest xmlns:android="http://schemas.android.com/apk/res/android" package="com.example.radioapp"> <application android:allowBackup="true" android:icon="@mipmap/ic_launcher" android:label="@string/app_name" android:roundIcon="@mipmap/ic_launcher_round" android:supportsRtl="true" android:theme="@style/AppTheme"> <activity android:name=".MainActivity"> <intent-filter> <action android:name="android.intent.action.MAIN" /> <category android:name="android.intent.category.LAUNCHER" /> </intent-filter> </activity> </application> <uses-feature android:name="android.hardware.camera.autoFocus" /> <uses-feature android:name="android.hardware.camera" /> <uses-permission android:name="android.permission.CAMERA" /> <uses-permission android:name="android.permission.ACCESS_NETWORK_STATE" /> </manifest> |
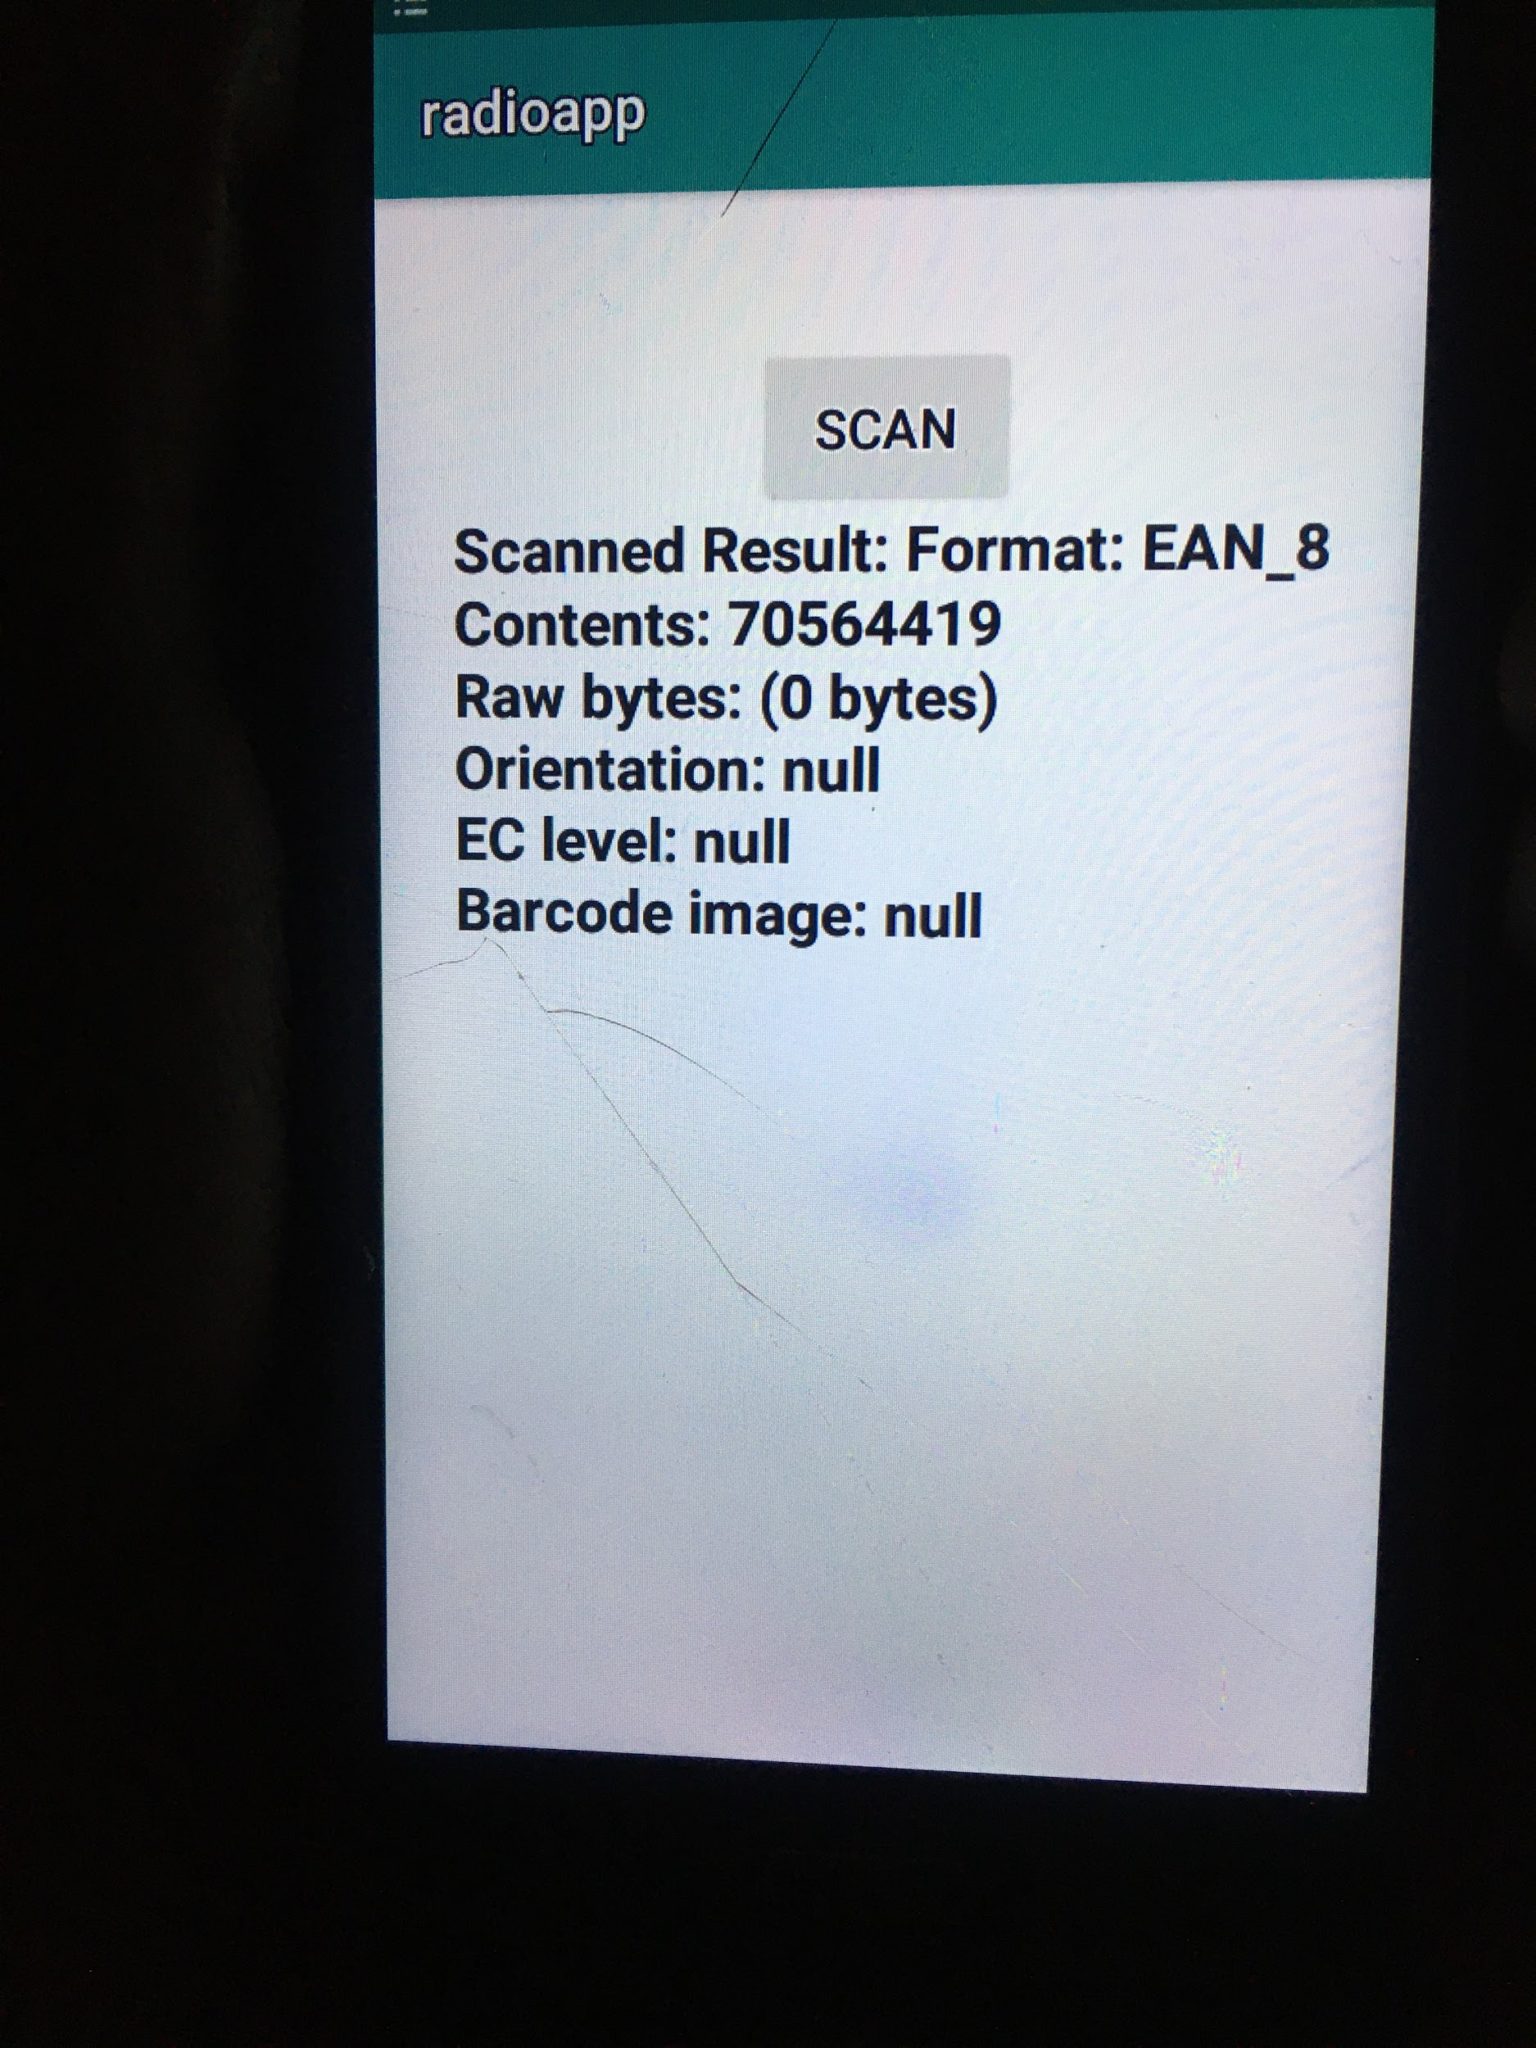
Output 1:

Output 2:
Output 3: