WordPress – Backup & Restore
There many times when backing up your website is necessary, such as during host transfers or version updates. This tutorial will be showing you how to back up your WordPress website and how to restore it later on.
Step 1: Backing Up Using Updraftplus
Updraftplus is a WordPress plugin which you will need in order to back up your website. First, download and activate the plugin from the plugin panel in your admin dashboard.

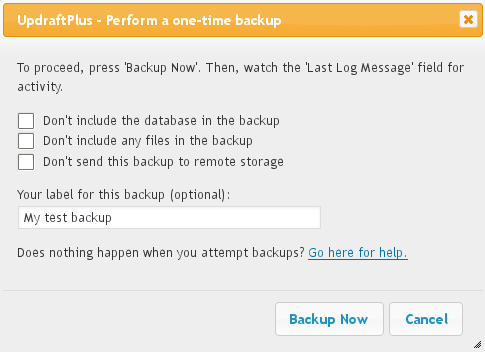
Backup in progress
Step 2: Selecting Backup Options
There are many options available for backing up your website.
- Archive format: This is the file type in which your backup will be stored as. ZIP file type is the default one and it is the most recommended type.
- Job Destination: This is where your file will be backed up to. Selecting more destinations will reduce the risk of file loss but it will definitely take more time. Make sure to configure destinations such as Dropbox and Email from the tabs above.
- Scheduling Backups: You may schedule automated backups by clicking on the “Schedule” tab above. Automated backups are the easiest when done with the “WordPress cron” option.
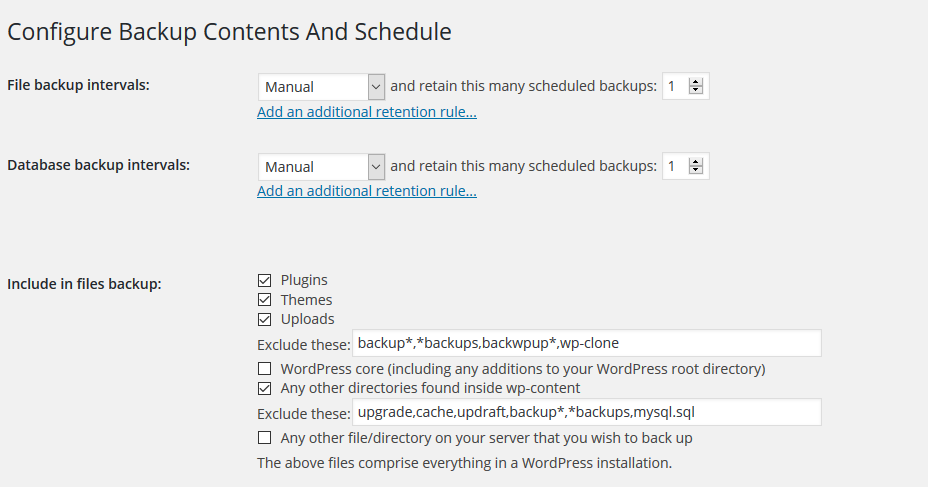
Another method to Schedule the backup

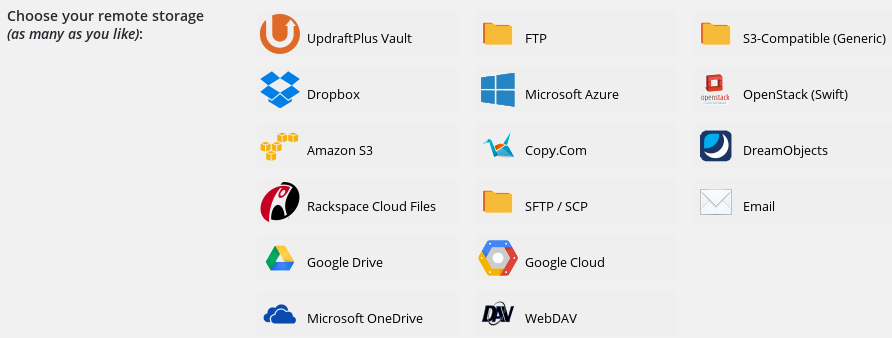
Remote storage options
UpdraftPlus has additional remote storage selections than any other WordPress backup plugin:
Step 3: Restoring the Back up
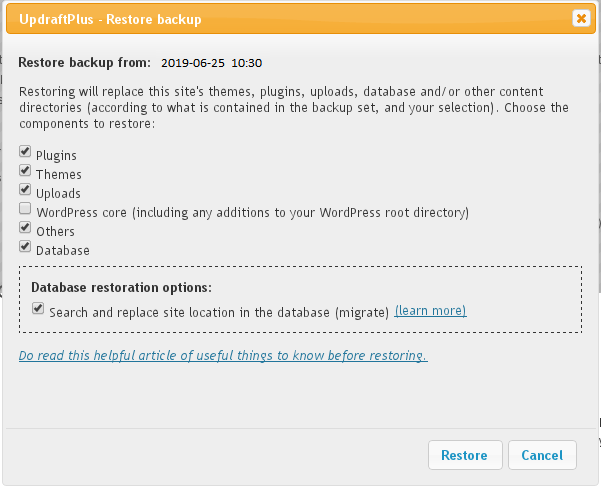
This is the dialog that opens if you select a backup set to restore:
Then simply head to the “import” tab and upload the file that you have backed up. If you had backed up your file on Dropbox then you will first need to download it then upload it on the cPanel. The website might need a few minutes to go back up after you have finished importing your files in some cases but otherwise, you are good to go.