Fix the 403 Forbidden Error in WordPress?
The 403 Forbidden error is more like what its name suggests. This error results in forbidding access to a specific page of the website and results even in something critical like getting locked out of your WordPress admin. For a beginner, this error could be a bit too frustrating.
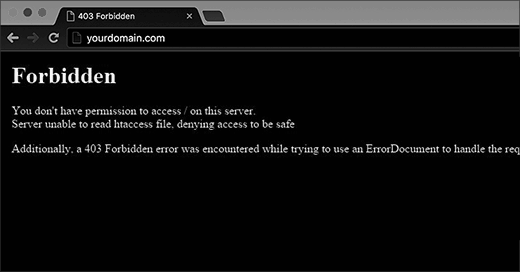
403 Forbidden Error Message::
In most cases, this error results in displaying the below message on your screen.
403 Forbidden – You don’t have permission to access ‘/’ on this server.
Additionally, a 403 Forbidden error was encountered while trying to use an ErrorDocument to handle the request.
Different scenarios where 403 forbidden errors can be seen in WordPress:
There are different types of 403 forbidden errors in WordPress. These are:
- Error 1:: Access denied on wp-admin or WordPress login page.
- Error 2:: During WordPress installation.
- Error 3:: When visiting a page on your WordPress website.
- Error 4:: The error message displays “Access Denied” instead of the complete 403 Forbidden error message.
- Error 5:: The error message looks something like this:
“Access to yourdomain.com was denied. You don’t have the authorization to view this page.”
Getting Locked Out of the WordPress Admin (wp-admin):
Most of the errors or issues that we face are more difficult to troubleshoot than to fix. One such troublesome WordPress issue is being locked out of the WordPress Admin. The troubleshooting of this error can be a bit troublesome. One of the most probable reasons behind your locking out of your WordPress admin is the 403 forbidden error.
Causes of the 403 Forbidden Error in WordPress:
The most expected reasons for the 403 Forbidden error in WordPress are:
- Poorly configured security plugins
- A corrupt .htaccess file
- Incorrect file permissions on your server
Resolving 403 Forbidden Error in WordPress – Caused by a WordPress Plugin:
Create a complete backup of your WordPress website, by following either of the below two ways:
- Manually create a WordPress backup. You can take help from an article or guide on this topic.
- Ensure access to the latest backup, in case, you have an automatic WordPress backup plugin.
The WordPress security plugins might be designed to block any malicious IP address. And this blocking might result in causing the 403 forbidden error. To resolve this error, disable all the plugins in WordPress. If the error gets resolved by this, then you can enable each plugin one by one. After enabling each plugin, check if the 403 forbidden error reappears in WordPress. This way, you would be able to find the error-causing plugin. You can then try to resolve the issue associated with that plugin that is causing the 403 forbidden error. If you are not sure about what to do with that plugin, you can contact your plugin support.
Resolving 403 Forbidden Error in WordPress – Caused by a Corrupt .htaccess File:
Create a complete backup of your WordPress website, by following either of the below two ways:
- Manually create a WordPress backup. You can take help from an article or guide on this topic.
- Ensure access to the latest backup, in case, you have an automatic WordPress backup plugin.
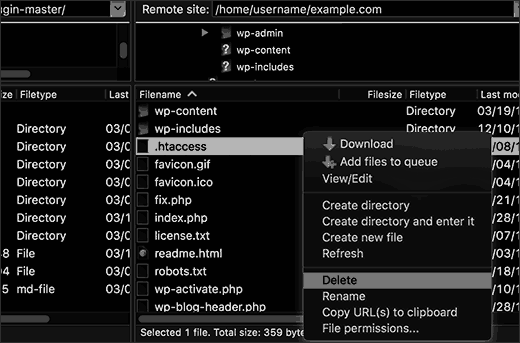
To fix the 403 forbidden error caused by a corrupt .htaccess file, what you need to do is to repair this file. To move ahead with that, you can follow the below steps.
- Use an FTP client or file manager in cPanel to connect to your website.
- Go to the root folder of your WordPress site.
- Locate the .htaccess file.
- Download it to your computer.
- A fresh backup of the file is now created for future use.
- Delete the .htaccess file from the server.
- Access your WordPress website.
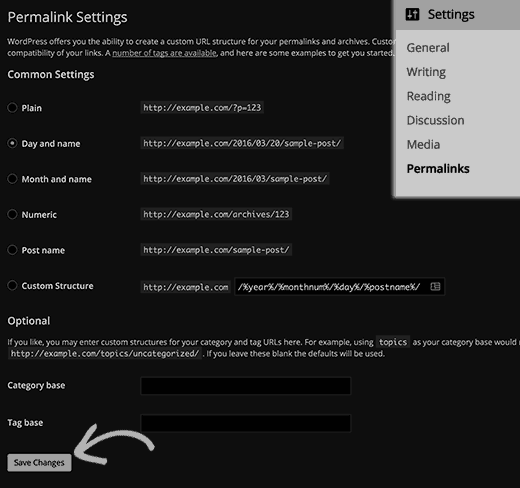
If the error gets resolved, you will be clear that the cause of the error was a corrupted .htaccess file. Now, all you have to do is to generate a new .htaccess file, by following the below steps.
- Log in to your WordPress admin area.
- Go to the Settings » Permalinks page.
- Locate the Save Changes button at the bottom of the page.
- Click on the button.
A new .htaccess file is now successfully generated.
Resolving 403 Forbidden Error in WordPress – Caused by File Permissions in WordPress:
Create a complete backup of your WordPress website, by following either of the below two ways:
- Manually create a WordPress backup. You can take help from an article or guide on this topic.
- Ensure access to the latest backup, in case, you have an automatic WordPress backup plugin.
Each file stored on a website has permissions associated with it, to keep a check on its accessibility and to enhance security. Incorrect file permission can result in causing an error. Sometimes, the modifications made by your WordPress hosting company in the server settings result in changing the file permissions as well. This can then become a cause for the appearance of 403 forbidden errors on your WordPress website.
The best solution to this problem is to contact your WordPress hosting company. They can check and can make or guide you to make the necessary changes related to the file permissions.
If the hosting company is not that supportive, it’s better to hire a professional to resolve the issue at hand.
But if you want to resolve it on your own, remember that it can be a bit tricky and we don’t recommend it to you if you are not skilled or confident about this.
To resolve the 403 forbidden error caused by incorrect file permissions in WordPress, you can follow the below steps.
- Use an FTP client to connect to your website.
- Go to the root folder.
- Here is where you will find all your WordPress files.
- Select a folder by clicking on it.
- Right-click on it.
- A menu will appear.
- Click on File Permissions.
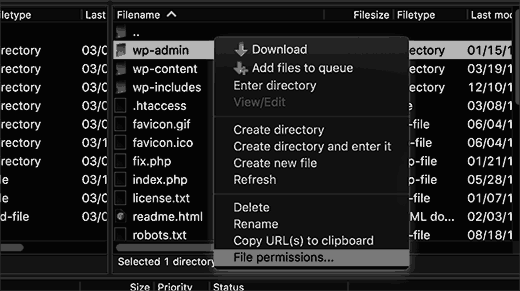
- A file permissions dialog box will appear.
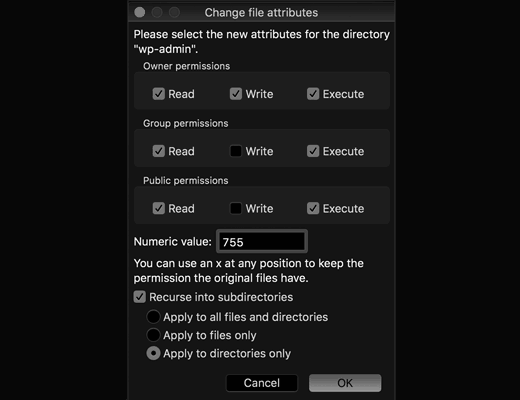
- Ensure that each folder on your WordPress website has file permission of 744 or 755.
- Set the file permission to the root folder to 744 or 755.
- Check the box next to ‘Recurse into subdirectories.’
- Check the ‘apply to directories only’ option.
- Click on the OK button.
- The permissions will be then set to all subdirectories in that folder by your FTP Client.
- Wait for the process to complete.
- Repeat the above steps for all the files.
- Ensure that each file on your WordPress website has file permission of 644 or 640.
- Check the box next to ‘Recurse into subdirectories.’
- Check the ‘apply to files only’ option.
- Click on the OK button.
- The permissions will be then set to all the selected files by your FTP Client.
- Access your website again.
The 403 forbidden error should have been resolved by now.