You can create an image gallery in WordPress either by
- Creating an image gallery using the default Gallery block of the WordPress block editor, i.e., without using any plugins, or
- Creating an image gallery using the WordPress image gallery plugins.
Creating an Image Gallery Using the WordPress image gallery plugins:
Though the first method is fast and effortless, it lacks some important features. We recommend the use of plugins if you want to add more extravagant features to your image gallery, such as creating a responsive image gallery in WordPress.
In this article, we are using the Envira Gallery plugin, which is also one of the most satisfactory WordPress image gallery plugins. If you are not very much aware of this plugin, you can look for some information about the same. If we will talk about the unique features of the Envira Gallery Plugin, we can briefly list a few of the most important ones.
- It is used to create completely responsive, captivating, and trendy image galleries in WordPress.
- It is super fast.
- It comes with numerous extravagant features like a drag and drop builder, easy image navigation, a lightbox popup, and professional gallery templates.
To create an image gallery in WordPress using the Envira Gallery plugin, you can follow the below steps.
- Install and activate the Envira Gallery plugin.
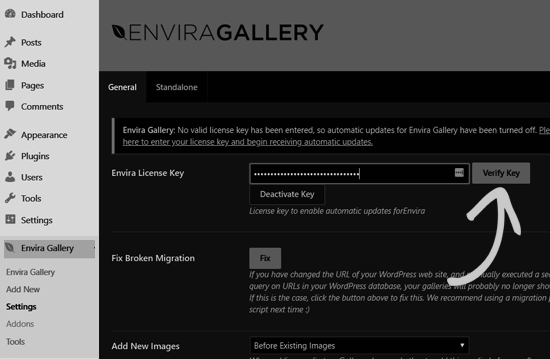
- Get the license key from your account on the Envira Gallery website.
- Go to the Envira Gallery » Settings page and enter your license key.
- Verify your license key.
- Now, you can move ahead with creating your first gallery.
- Go to the Envira Gallery » Add New page.
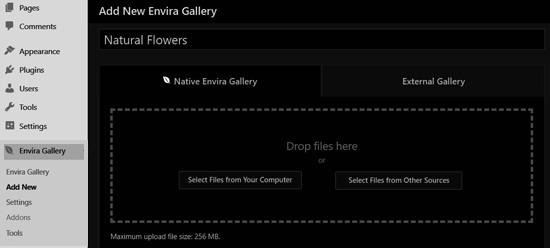
- Add a title for your gallery.
- Move ahead with one of the two options.
- Click on the ‘Select files from computer’ button. Upload the images.
- Click on the ‘Select files from other sources’ button. Select files from your WordPress media library.
- The uploaded images will then be displayed in the Gallery section.
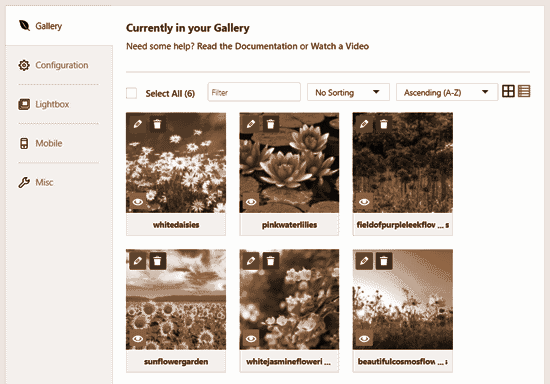
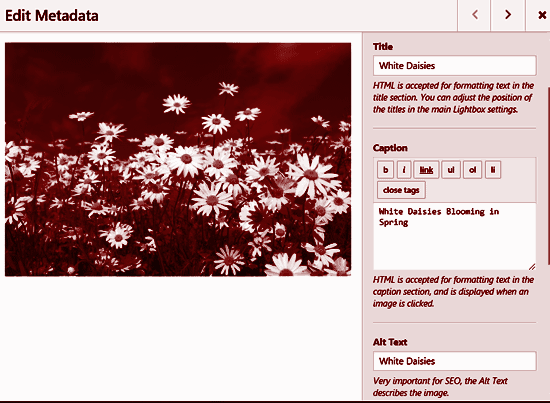
- Click the pencil icon on any image.
- You can then add caption, title, and alt text for the respective image.
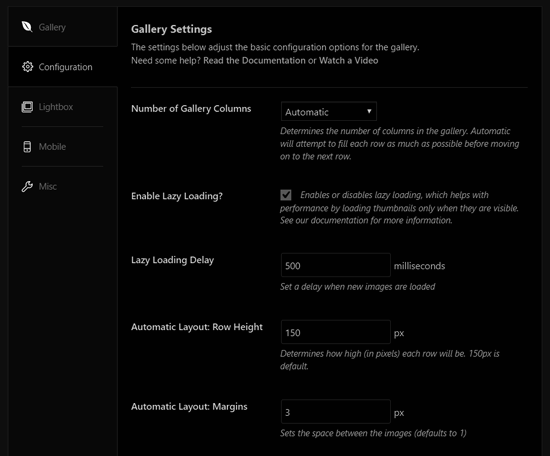
- Click on the ‘Configuration’ tab.
- Edit your gallery settings, if required.
- You can modify the number of columns, image lazy loading, title and caption positioning, margins, heights, thumbnail sizes, image dimensions, etc.
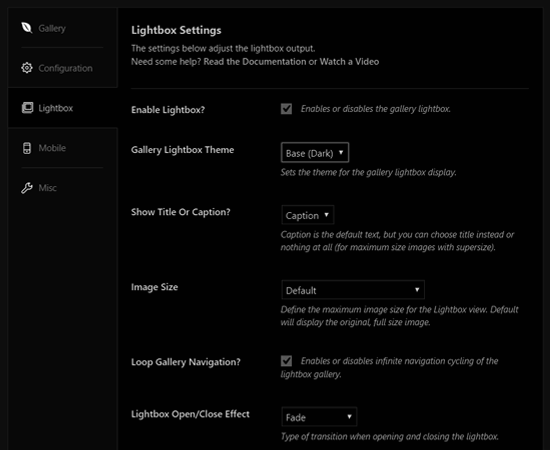
- Click on the ‘Lightbox’ tab.
- Here, you can allow the users to enlarge images and browse them without ever leaving the page.
- Edit the settings, if required.
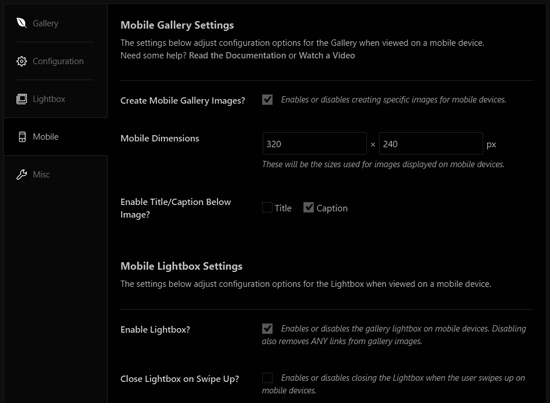
- Click on the ‘Mobile’ tab.
- Here, you can configure the gallery settings for mobile devices.
- You can also choose image dimensions for mobile devices, enable or disable lightbox, etc.
- Review and edit other options like gallery slug, if required.
- Add custom CSS from the ‘Misc’ section, if required.
- Publish your gallery.
- Now, your gallery can be added anywhere on your WordPress site.
- Edit a post or page where the gallery is to be added.
- The post edit screen will appear.
- Click on the Add New Block icon.
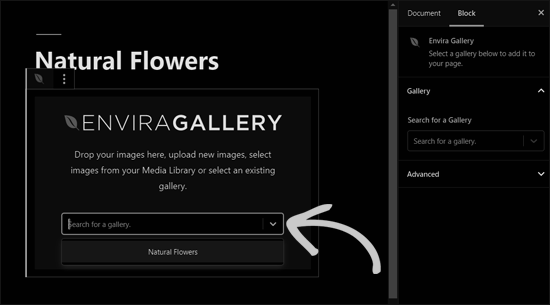
- Select the Envira Gallery block.
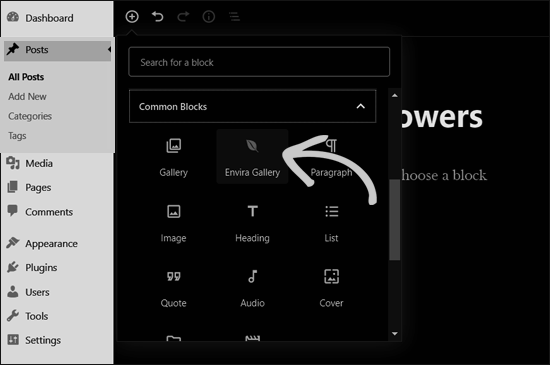
- The Envira Gallery block will be added to the post editor.
- Search the required gallery.
- Here, you have two options,
- Search by name.
- Search by clicking on the dropdown arrow icon.
- The gallery will thus be added to the post editor.
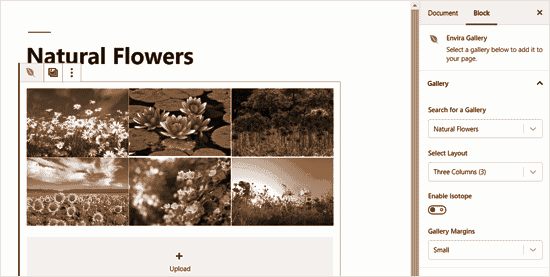
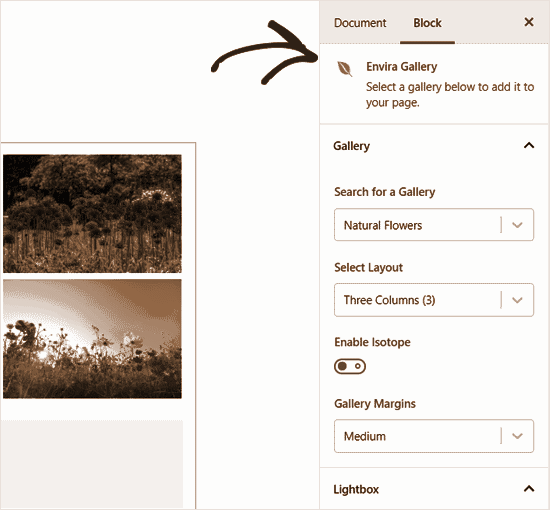
- Review the gallery settings.
- Save the post.
- Preview the post.